
Hospital beds are more than ward furniture; motorized models are medical electrical equipment, so installation must protect patients, staff, and the device itself. Under IEC 60601-1 and IEC 60601-2-52, a bed should be assembled according to the manufacturer’s documented instructions and have its safety functions verified before the first patient occupies it [1][2]. This guide covers the practical route assessment, mechanical checks, electrical verification, placement, and handover documentation needed for a controlled hospital bed installation.
1. Pre-Installation Site Assessment
Before delivery, walk the full route the bed will travel from loading dock to final ward. Pay attention to doorways, corridors, elevator cabins, ramp slopes, and the final bed position.
| Route point | Clearance check | Why it matters |
|---|---|---|
| Doorway along route | At least 1100 mm clear width for 970 mm bed frames | Prevents frame, headboard, or side rail impact |
| Corridor | At least 1500 mm clear width | Allows bed passage with staff and monitors |
| Elevator | Cabin depth must clear full bed length plus staff space | Avoids unsafe tilting at door thresholds |
| Bedside turning space | Enough radius for the bed to turn without lifting casters | Prevents wall damage and caster overload |
For common Yingyun hospital bed frames around 2170 mm long and 970 mm wide, a 1000 mm doorway is generally too tight once side rails, IV pole sockets, and hands of the movers are considered. Confirm dimensions from the actual order, not a generic hospital furniture estimate.
Environmental and power points should also be confirmed:
- Indoor temperature and humidity range must match the bed’s electrical components and actuator rating.
- The mounting area should be dry, away from direct steam, splash zones, or intense heat sources.
- Electrical outlets must match the bed’s voltage and frequency, with no dependence on loose extension cords.
- Emergency power or battery backup policy should be confirmed for motorized beds in critical care areas [4].
2. Delivery and Pre-Assembly Inspection
Do not assemble a bed directly from a damaged pallet or crate. Record the delivery condition first.
- Inspect outer packaging, wooden frame, and cartons for crushing or water marks.
- Check the packing list against the order and confirm all sections, side rails, casters, cranks or actuators, head/foot boards, and hardware bags are present.
- Examine bed panels, frame weld points, casters, and electrical cables before assembly.
- If transport damage is found, photograph it, quarantine the bed, and separate defective components instead of forcing installation.
A bent frame section or a damaged actuator mount can pass from a packing problem into a fall risk after the bed is loaded. <Ensuring Quality Control in Hospital Bed Parts: A Comprehensive Guide> covers incoming inspection steps and common defect signals that should stop assembly before a bed reaches the ward.
3. Mechanical Installation and Component Checks
Assemble the bed on a level surface and follow the manufacturer’s assembly sequence. For several component groups, the installation check is as important as the tightening of fasteners.
Casters: Insert and secure central-locking or individual-brake casters, then test the brake pedal. All braked casters should lock without partial rotation. Check for smooth rolling, no wheel wobble, and no noise before loading the bed.

Side rails: Install and exercise each rail through its full fold and raise travel. The latch must lock with an audible or visible confirmation, and the rail must not drift down when pushed. Check the gap between rail and mattress support to avoid entrapment concerns under IEC 60601-2-52 principles [2].

Bed panels: Align stamped bed panel sections so there are no sharp edges, misaligned tabs, or gaps that can pinch linen or tubing. If panels are welded, inspect welds for cracks; if they are bolted, confirm all fixing parts are seated before applying final torque.

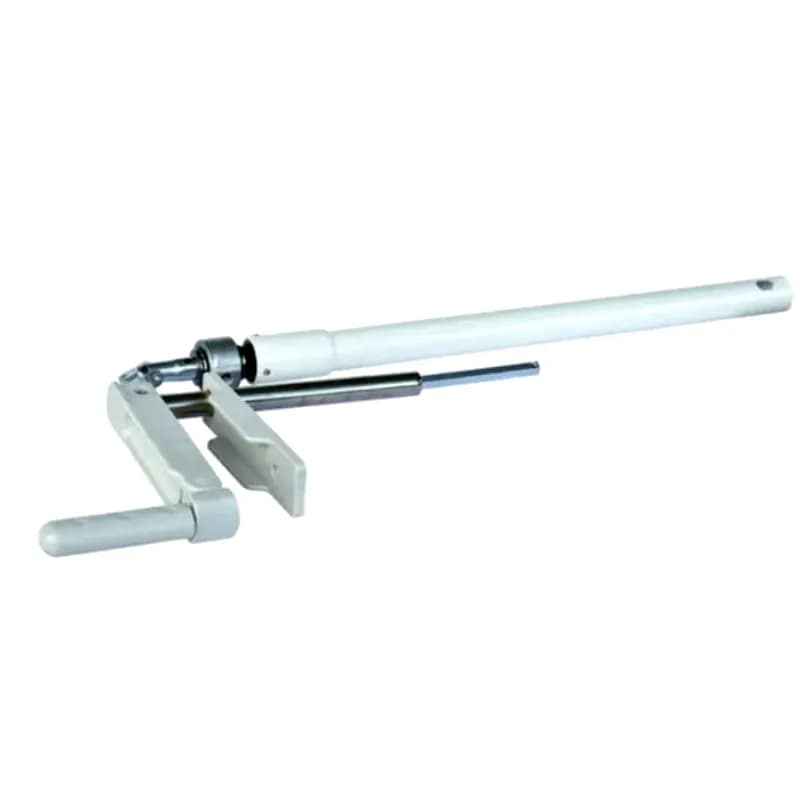
Crank and actuator mechanisms: For manual beds, confirm the crank handle engages fully and includes its in-place protection. For Yingyun manual three-crank beds, the backrest, knee section, and bed height are adjusted through separate crank systems, so each mechanism should be tested through at least one no-load cycle before use. For electric beds, confirm actuator fixing seats are secure and run each movement slowly to check for obstruction or drag.
4. Electrical Verification and Functional Testing
For motorized beds, electrical verification comes after mechanical assembly and before patient placement.
- De-energize the bed before connecting or inspecting the power cord.
- Confirm the plug, cord, controller casing, and strain relief points are undamaged.
- Verify the outlet is hospital-grade, correctly grounded, and voltage-matched. Do not rely on an extension cable as a permanent solution.
- Check that the bed can be moved to a safe low position by battery backup or manual release if the facility policy requires it [4].
Then run the full no-load function test:
- Backrest raise and lower.
- Knee section raise and lower.
- Bed height up and down.
- Trendelenburg or reverse Trendelenburg, if specified.
- Emergency stop, pendant buttons, and battery or manual fail-safe function.
Listen for abnormal motor noise, delayed movement, or asymmetric lifting. If movement jerks or stops, recheck cable routing and mechanical clearance before loading.
After the mechanical checks, a full function test confirms whether the bed actually performs as its controls suggest. <What is an Adjustable Hospital Bed and How Does It Work: A Comprehensive Guide> covers the positioning functions that installers should verify during a pre-handover test.
For site-specific electrical or dimensional questions, contact Yingyun Hardware at [email protected] or +8613528198959 with the bed model, supply voltage, and doorway width. An engineer can help confirm actuator parameters, caster compatibility, and clearance before final positioning.
5. Final Placement, Accessories, and Clearance
Once the bed passes functional testing, move it to the assigned ward position and verify the installed clearances again. The bed should not block medical gas outlets, suction equipment, nurse call controls, fire extinguishers, or an emergency route.
- Lower the bed to a safe transfer height before moving it.
- Engage all brakes after final positioning.
- Re-check that all braked casters remain locked after the bed is released.
- Place IV poles, bedside cabinets, and overbed tables so they do not create a trailing cable or trip path.
- Keep the area around the headboard accessible for staff response and bed controls.
6. Safety Validation, Documentation, and Handover
Installation is not complete until the bed is accepted against a written checklist and the staff who will use it understand the controls.
A final validation should include:
- Side rails latching and resisting downward movement.
- Caster brake function with the bed stationary.
- Bed panel and guardrail edges free of sharp points or excessive gaps.
- Electrical cable condition and correct grounding.
- Full motor and hand pendant function from a normal clinical position.
- Emergency lowering or battery operation where applicable.
- Manufacturer-recommended load or function test for the rated safe working load.
Risk-based verification is especially important for beds that remain in long-term care, ICU, or bariatric service, because a missed check is harder to correct after patient use begins. ISO 14971 provides a framework for identifying residual risks before acceptance and deciding whether additional controls or restrictions are required [3].
Complete an installation record containing model, serial number, location, date, technician name, test results, and any limitations. Train nursing staff on pendant operation, brake release, side rail use, and emergency lowering, then have the responsible biomedical technician or facility engineer sign off.
A safe installation includes more than plugging in the bed and raising the side rails. <Essential Safety Features for Adjustable Medical Beds> covers the brake, side rail, emergency function, and control details that should appear in the acceptance checklist.
Finally, place the bed on a preventive maintenance schedule covering casters, moving parts, side rail locks, electrical cables, and periodic function testing. The facility maintenance plan should align with manufacturer intervals and the local medical equipment management requirement [5].
Plan Installation With Project-Specific Support
If you are preparing a ward conversion, new clinic opening, or multi-bed rollout, installation details often vary by bed function, local voltage, and doorway layout. Contact Yingyun Hardware at [email protected] or +8613528198959 with the bed model, site plan, power supply, and required mobility path. The engineering team can provide component-level guidance, technical documentation, and an installation checklist matched to your order so acceptance moves faster and fewer issues reach the patient floor.
Frequently Asked Questions
What doorway width is needed for a standard hospital bed?
For a common 970 mm width bed frame, plan at least 1100 mm clear door opening. If the route includes corners, ramps, or an elevator, measure the full bed length plus staff movement space, not only the static bed width.
Do electric hospital beds require a dedicated electrical circuit?
They do not always require a dedicated branch circuit, but the outlet should be hospital-grade, correctly grounded, and matched to the bed’s voltage and frequency. Avoid permanent extension cable arrangements and confirm that the facility’s emergency power or UPS policy covers beds that require powered lowering in an outage.
Who should perform hospital bed installation and sign-off?
A trained hospital bed technician, biomedical engineer, or authorized service provider should perform assembly, electrical checks, safety-function tests, and final sign-off. Nursing staff should receive hands-on orientation for pendant controls, brakes, side rails, and emergency operation before patient use.
What should be checked before a bed is placed into service?
Check frame security, bed panel alignment, side rail locking, caster brakes, electrical cable condition, actuator response, no-load and emergency functions, and completion of the written installation record.
How often should installed beds be rechecked?
At minimum, inspect moving parts, casters, side rail locks, brake function, and electrical controls every six months, and after any fall, incident, repair, relocation, or water exposure. The maintenance frequency should also follow the manufacturer’s instructions and the facility’s risk-based plan.
References
- IEC 60601-1:2005+AMD1:2012+AMD2:2020. Medical electrical equipment – Part 1: General requirements for basic safety and essential performance. International Electrotechnical Commission.
- IEC 60601-2-52:2009+AMD1:2015. Medical electrical equipment – Part 2-52: Particular requirements for basic safety and essential performance of medical beds. International Electrotechnical Commission.
- ISO 14971:2019. Medical devices — Application of risk management to medical devices. International Organization for Standardization.
- NFPA 99. Health Care Facilities Code, 2021 edition. National Fire Protection Association.
- World Health Organization. Medical equipment maintenance programme overview. WHO, 2011.
If you’re interested, check out these related articles:
Identifying Reliable Brands for Adjustable Hospital Beds
Are Adjustable Hospital Beds Covered by Insurance or Medicare
Top Wholesale Hospital Bed Parts Manufacturers & Suppliers